3First start
This chapter tells you what to do when you start Stratum 4D for the first time.
The setup steps
At the first start, Stratum 4D asks two questions: which layout you want, and where to keep the projects. You can change both answers later in Settings.
Select the layout
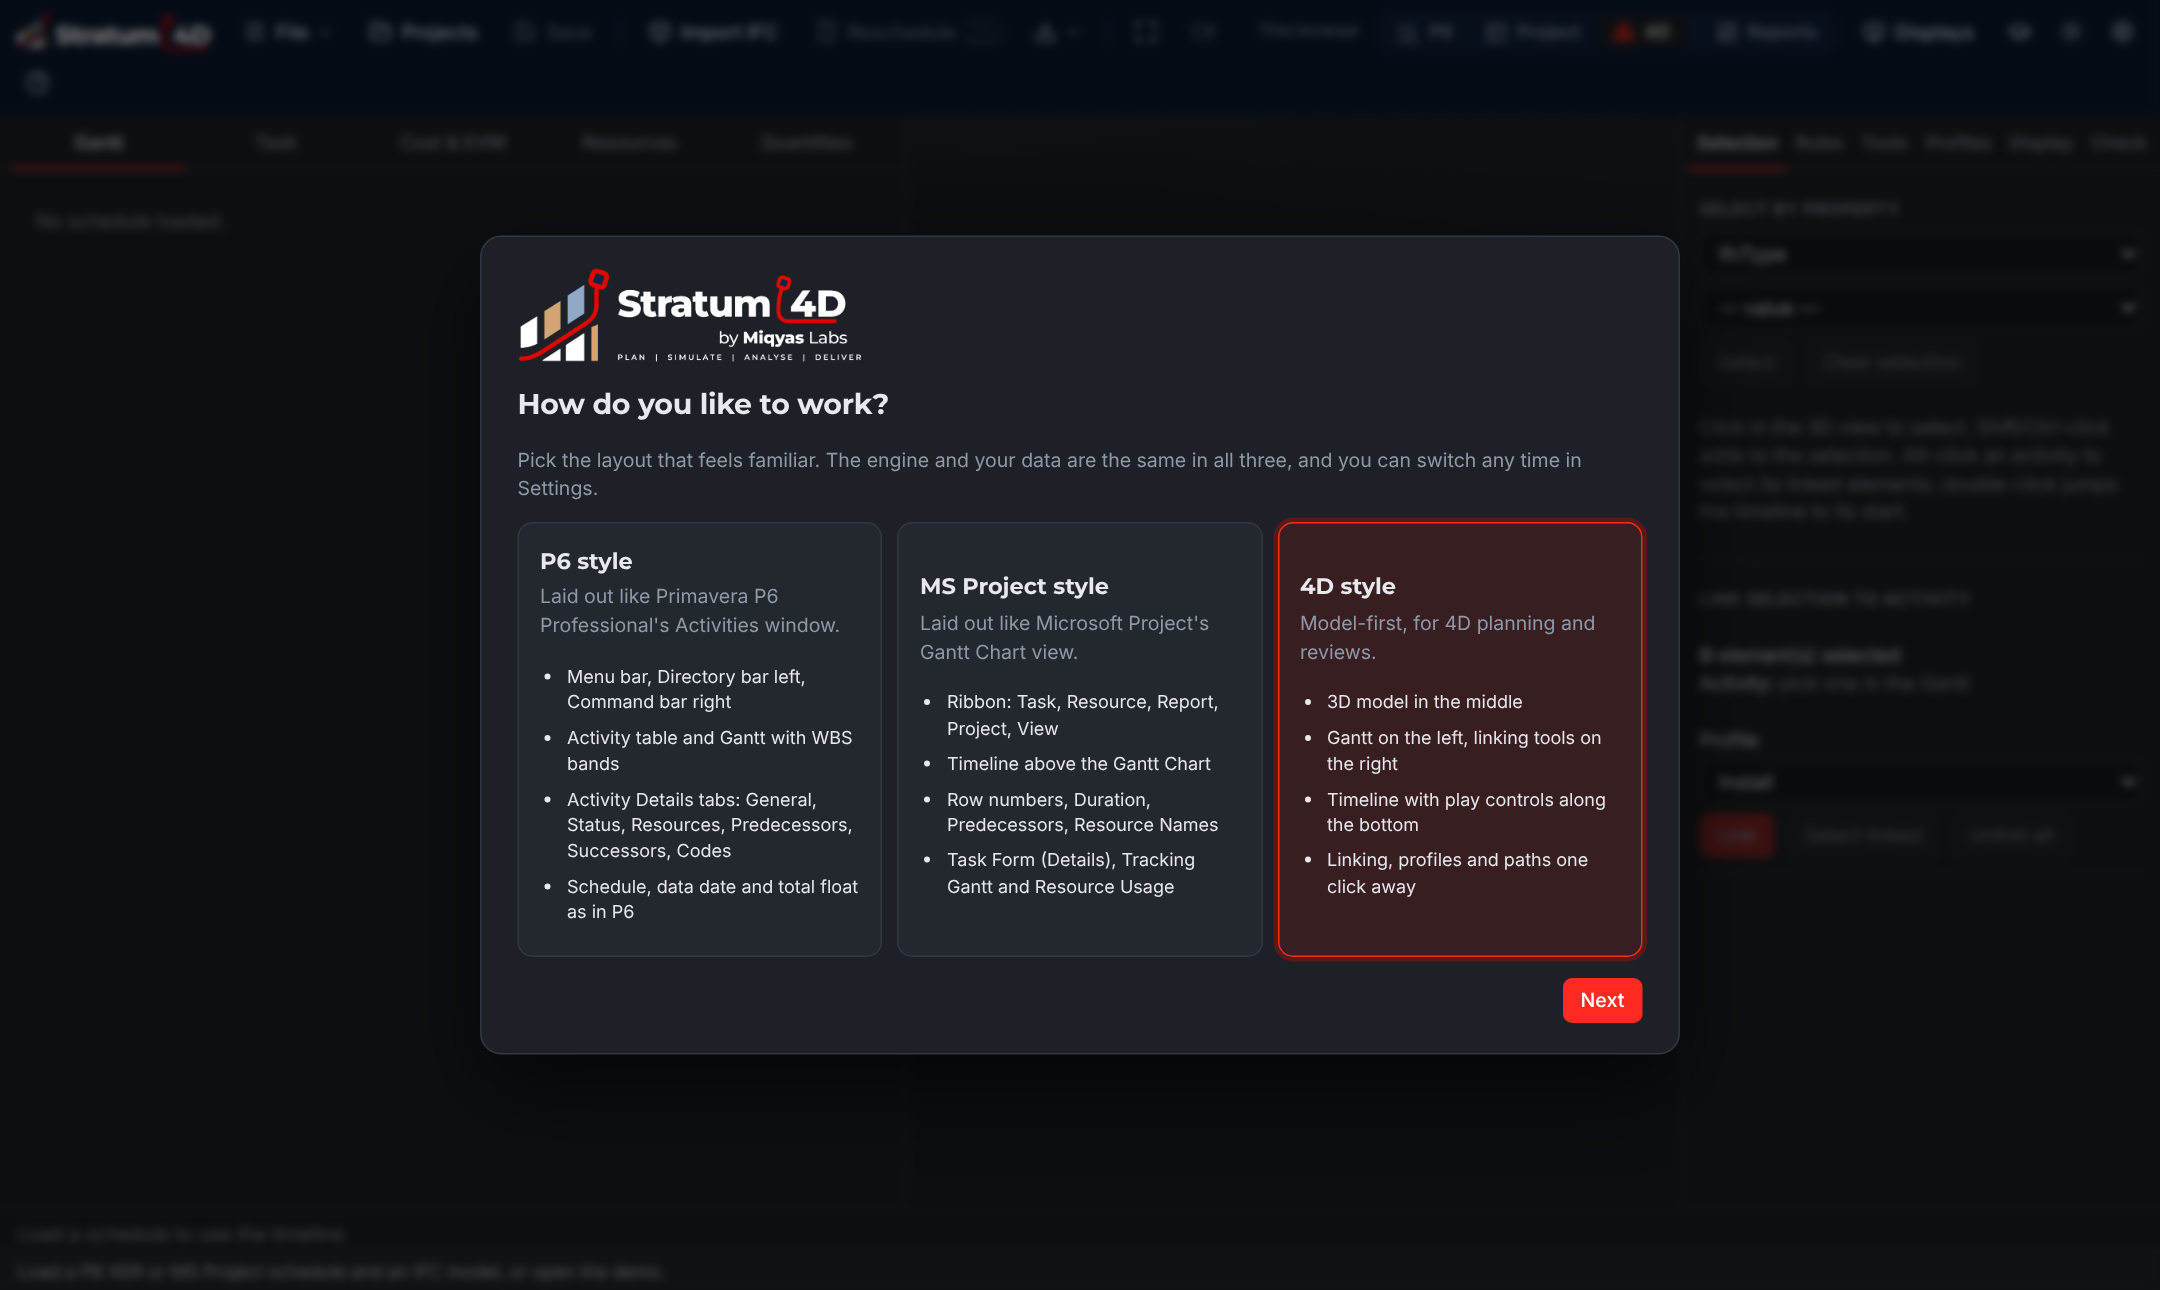
- Click P6 style, MS Project style or 4D style.
- Click Next.
If you work with Primavera P6 every day, select P6 style. If you make 4D simulations, select 4D style.
Select the storage
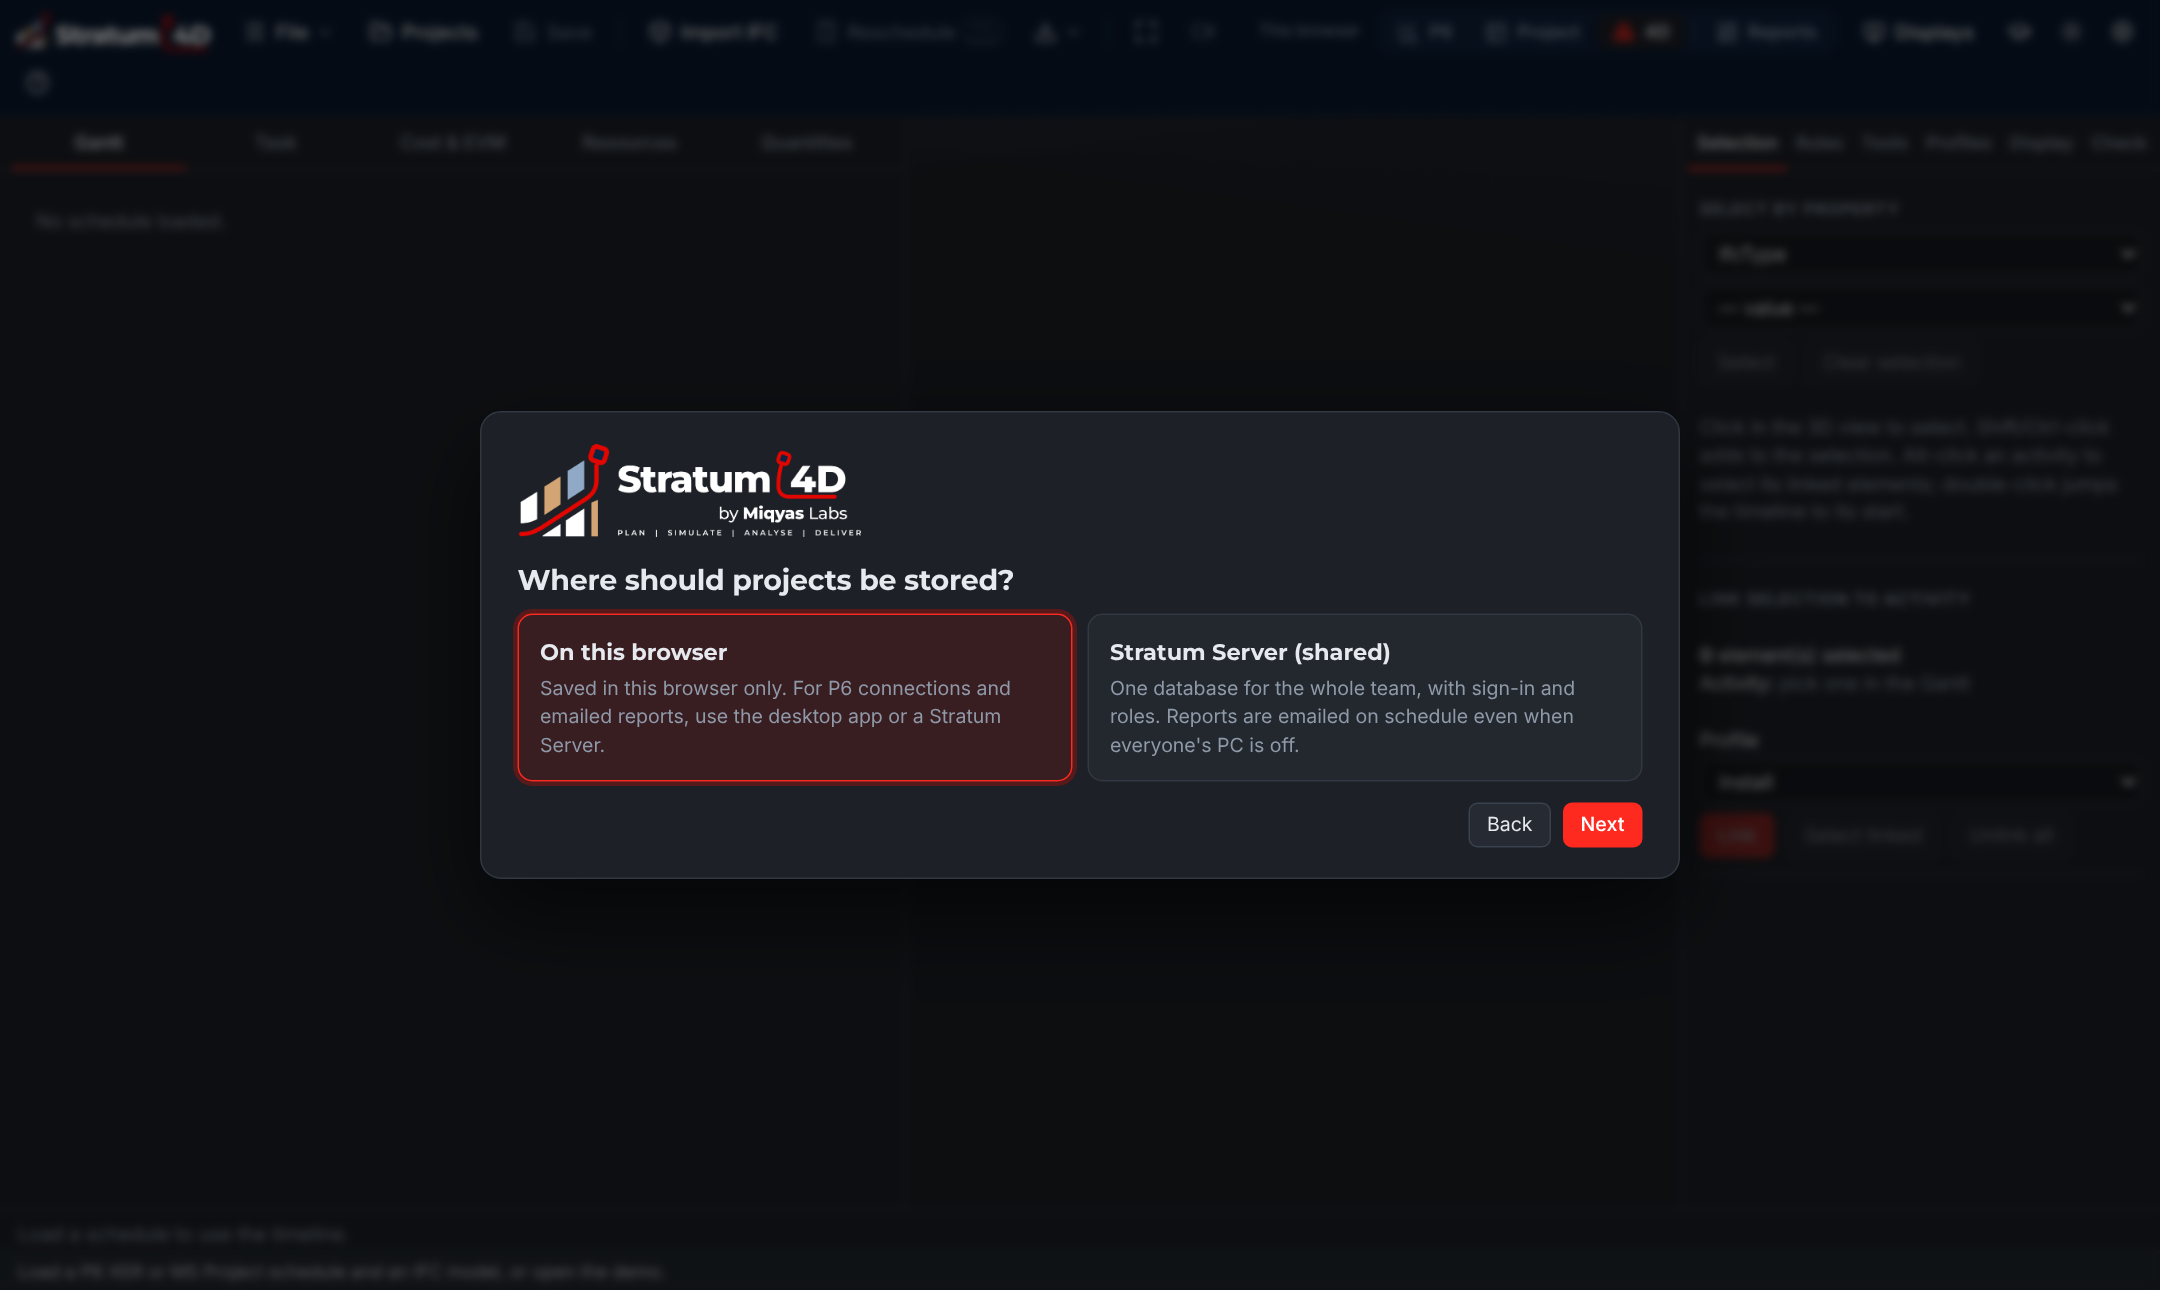
| Storage | Use it when |
|---|---|
| On this computer (desktop) or On this browser (web) | You work alone. The projects stay on this computer. |
| Stratum Server (shared) | Your team has a Stratum Server. All users work on the same projects, with sign-in and roles. |
To keep the projects on this computer
- Click On this computer (or On this browser).
- Click Next.
To connect to a Stratum Server
- Click Stratum Server (shared).
- Type the address of the server that you got from your administrator.
- Click Check.Stratum 4D finds the server.
- If the server is new, type a name, an email address and a password for the first administrator. Then click Create admin and connect.
- If the server has users, type your email address and password. Then click Sign in.The step Ready opens.
Optional connections
The last step, Ready, lets you connect to Primavera P6 and set up email for reports. These two buttons show only in the desktop application and with a Stratum Server. You can skip this step. Chapter 4 and the chapter about P6 connections tell you how to do this later.
- To connect to P6 now, click Connect to P6….
- To set up email now, click Set up email….
- To skip, click Start.The workspace opens.
The empty workspace
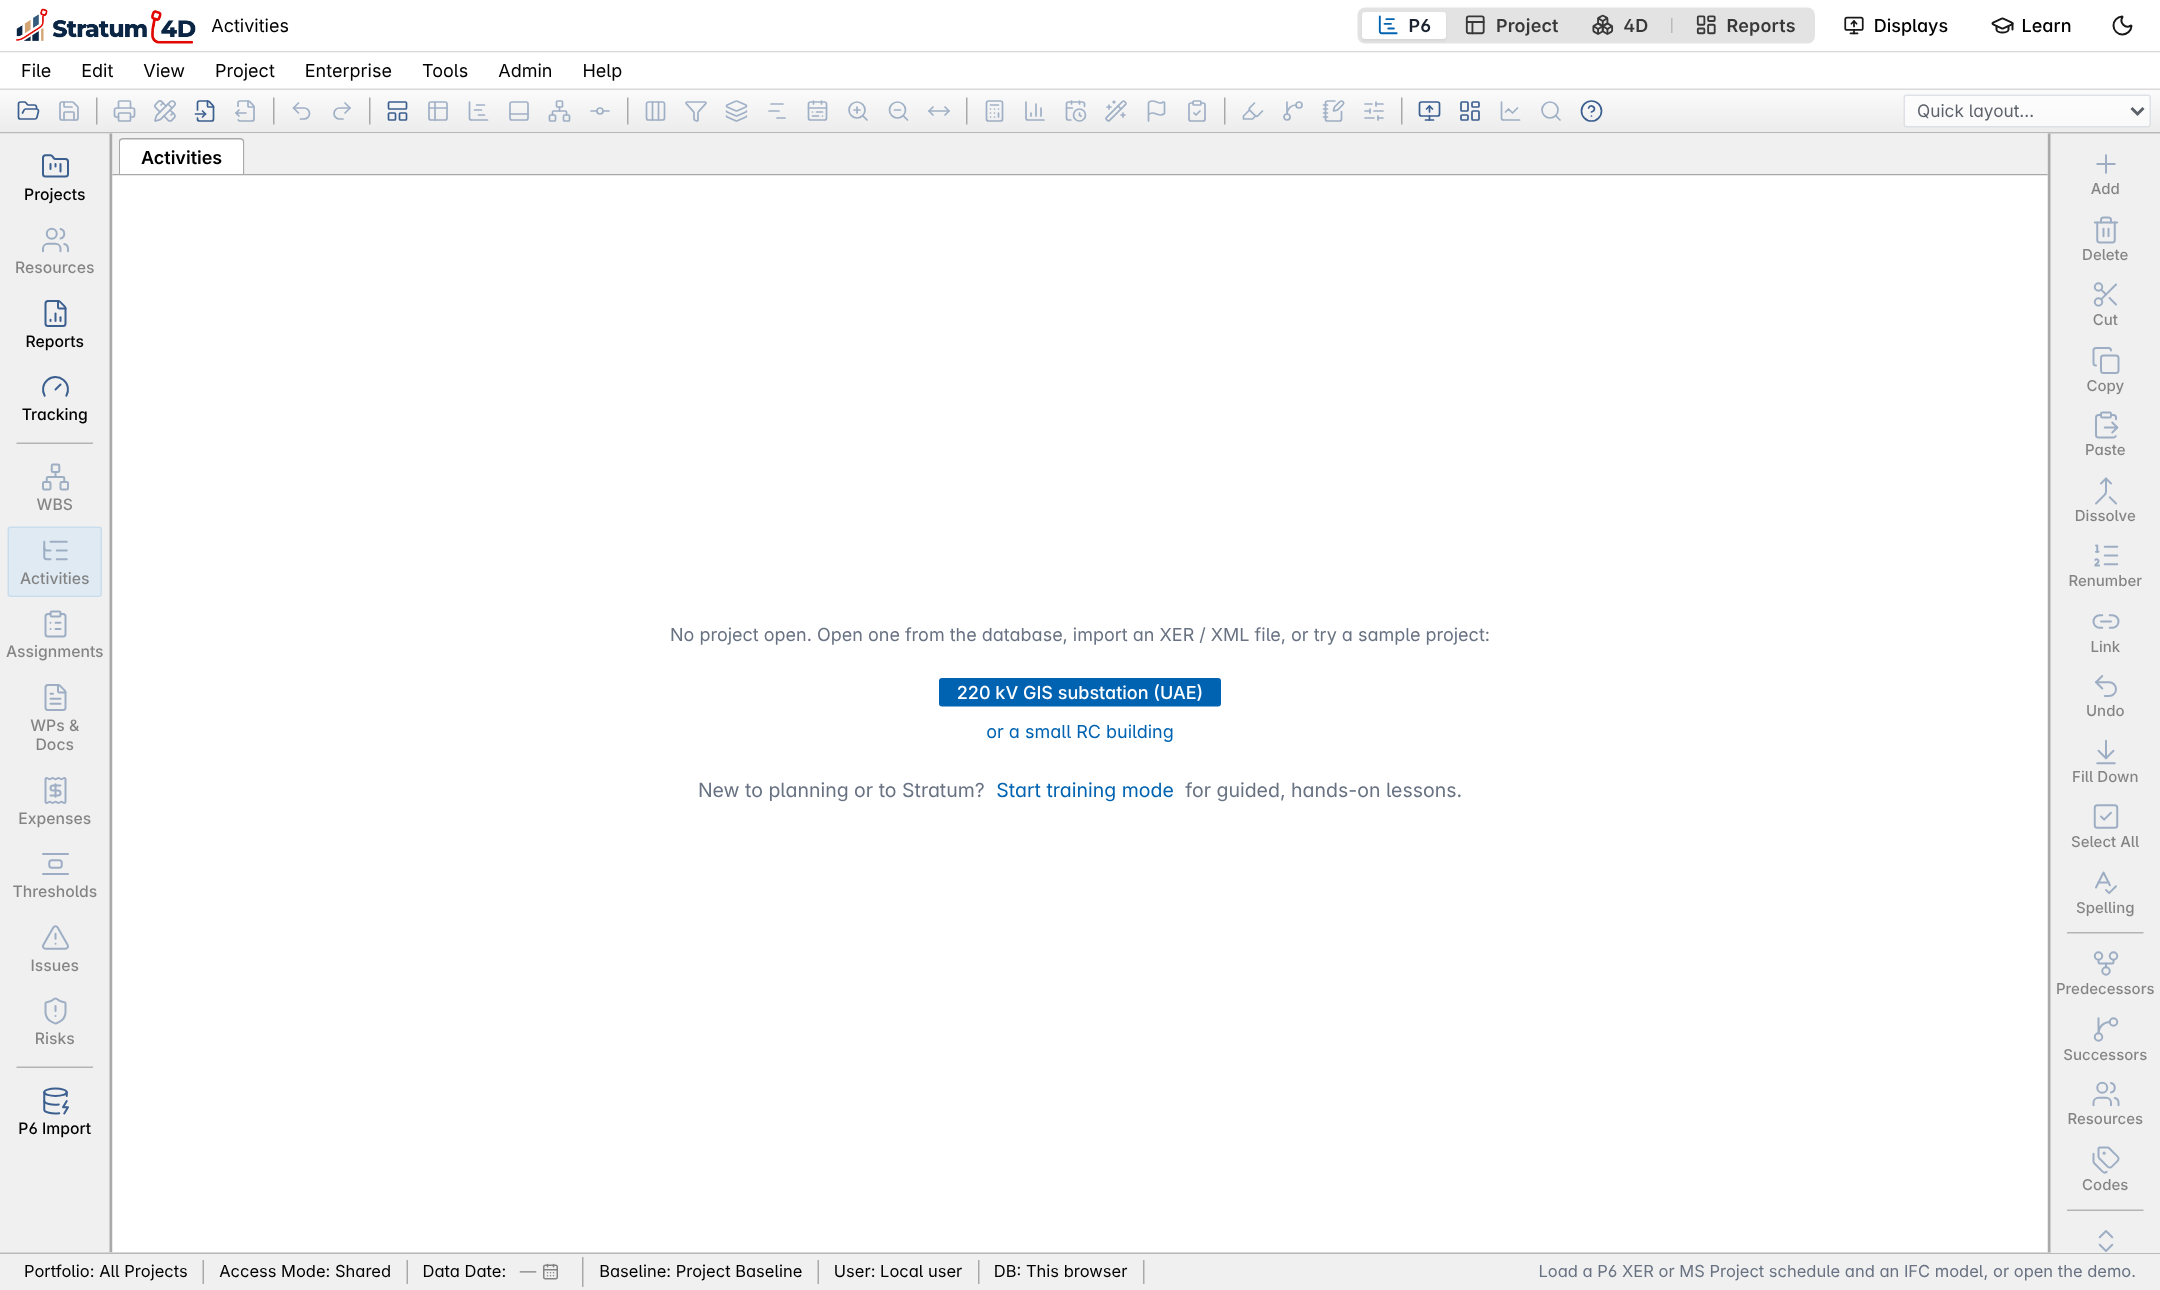
When no project is open, the workspace shows a short message. From it, you can open a sample project or start the training.
To open a sample project
- Click 220 kV GIS substation (UAE).The sample project opens in the layout that you selected.
To start the training
- Click Start training mode, or click Learn on the top bar.
- Select a lesson or a course.The lesson shows you each step in the software.
Change the settings later
- On the top bar, click the gear icon (Settings).
- Select a tab: Interface, Data & sign-in, Primavera P6, Email or Users.
- Make the changes. If the tab has a Save button, click it.
- Click the X at the top right to close Settings.
Use the moon icon on the top bar to change between the light theme and the dark theme.