6The Project layout
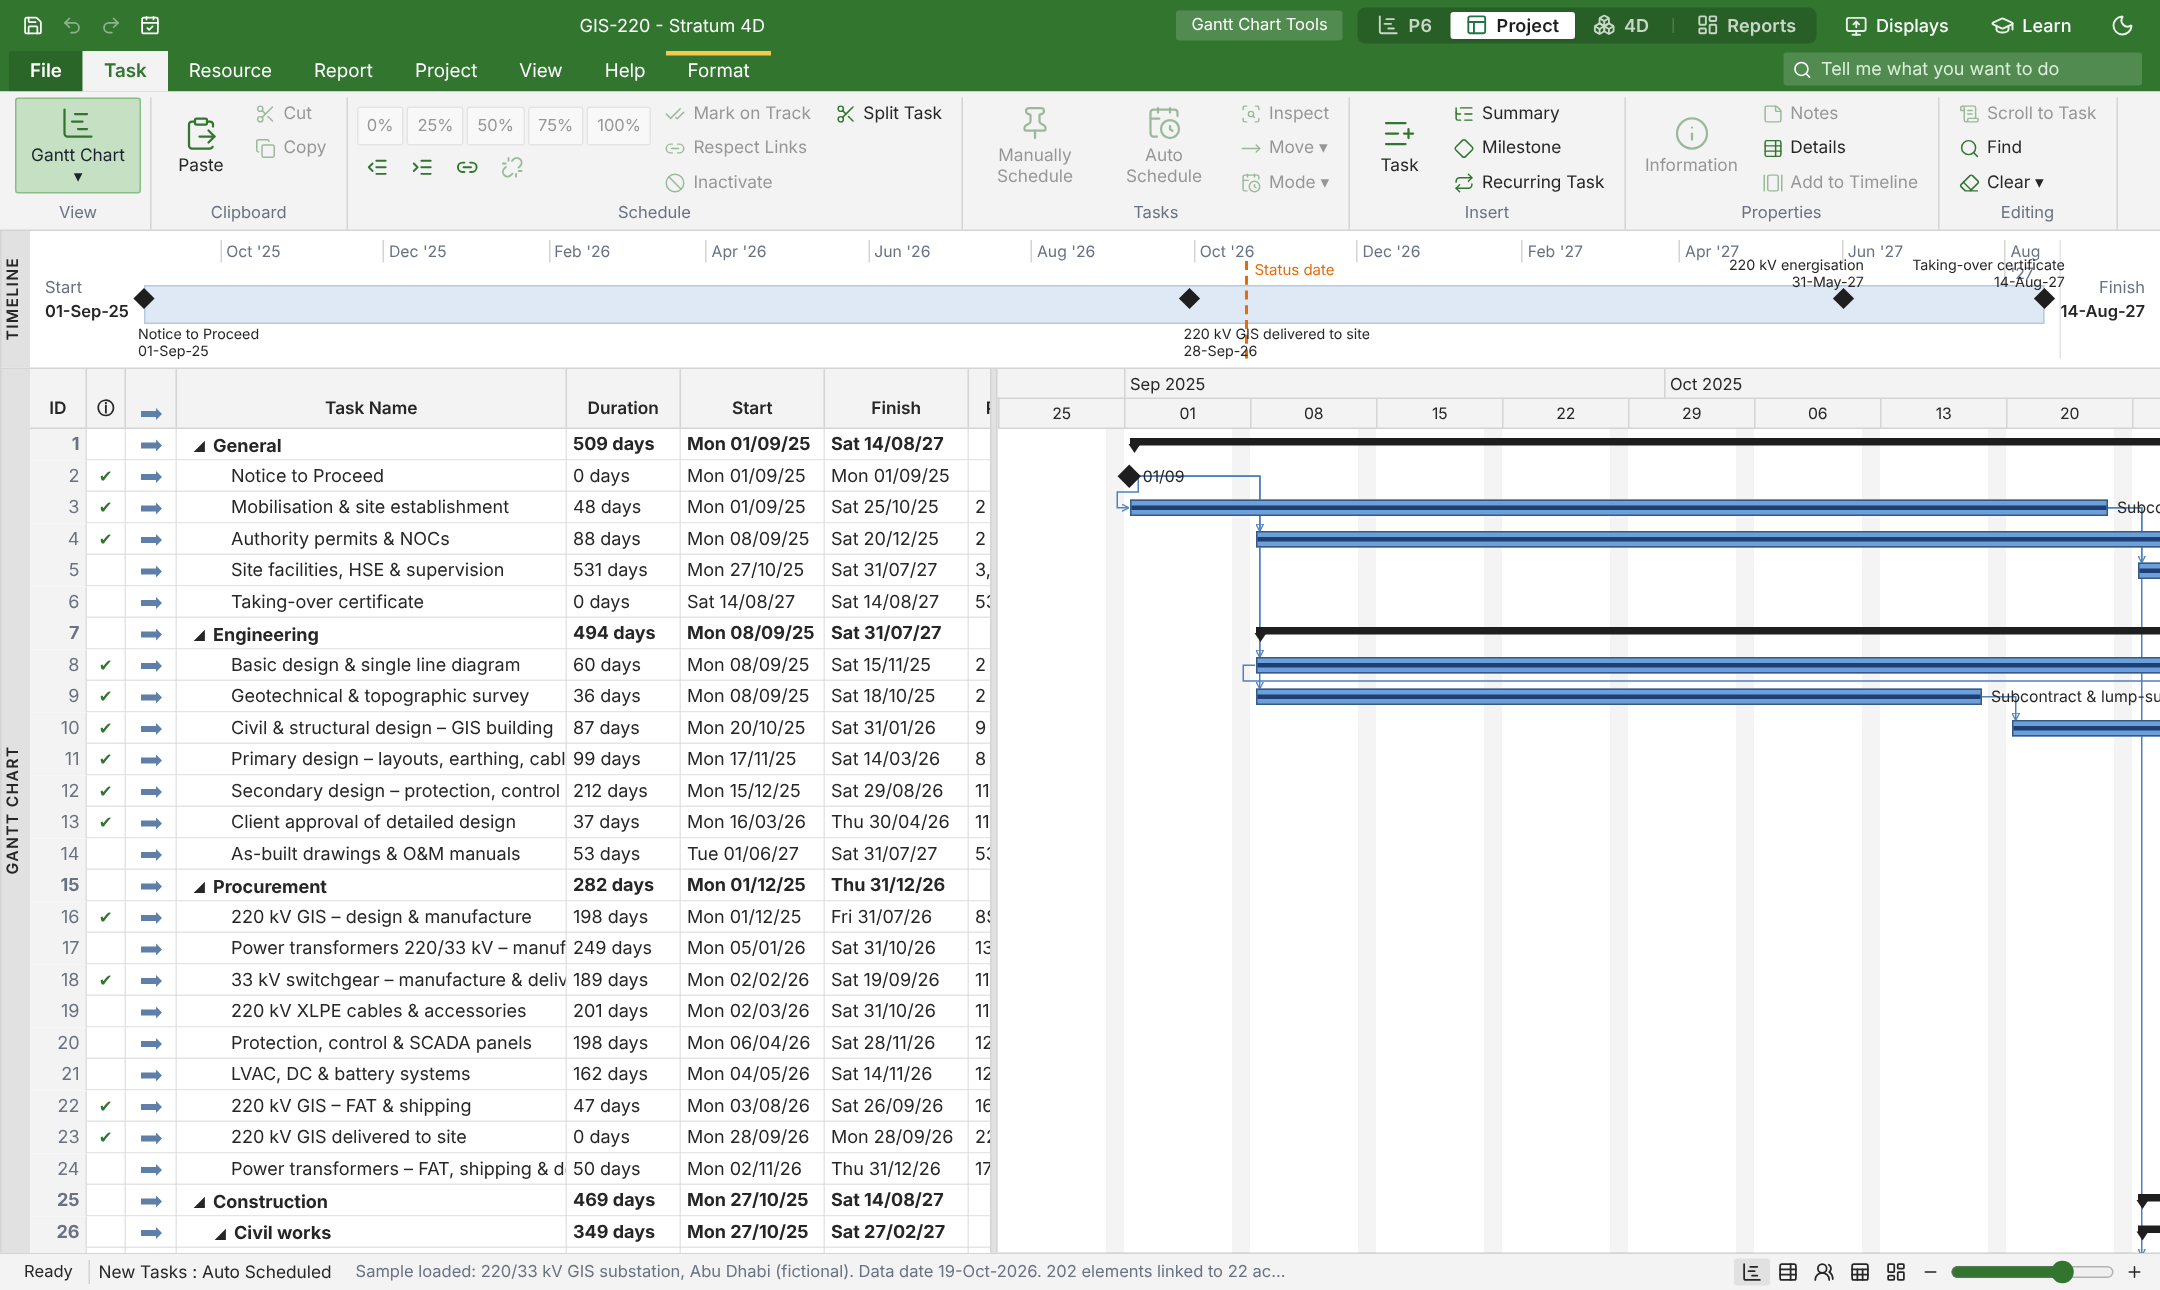
This chapter tells you how to use the Project layout. This layout has the same parts as Microsoft Project.
Parts of the Project layout
| Part | Where | Use |
|---|---|---|
| File tab | Top left | Open, save, import, export and print (the Backstage view) |
| Ribbon | Top | Task, Resource, Report, Project, View and Format tabs |
| Timeline | Below the ribbon | A summary of the project dates |
| Task sheet | Left | One row for each task |
| Gantt chart | Right | One bar for each task |
| Status bar | Bottom | The mode for new tasks, and the view buttons |
Make the tasks
To add a task
- Click the first empty row of the task sheet.
- Type the Task Name and push Enter.
- Type the Duration, for example
5dor2w.
To make a milestone, click Task › Milestone, or type a duration of 0d.
To make a summary task
- Select the tasks below the summary row.
- Push Alt+Shift+→, or click the indent button on the Task tab.The row above becomes a summary task. Its bar starts at the first task and ends at the last task.
To link tasks
- Select the tasks in the sequence of the work.
- Push Ctrl+F2, or click the link button on the Task tab.Each task becomes the predecessor of the next task (Finish-to-Start).
You can also type the predecessors in the Predecessors column, for example 4FS+2d.
Auto scheduled and manually scheduled tasks
An auto scheduled task gets its dates from the logic and the calendar. A manually scheduled task keeps the dates that you type. The scheduler does not move it.
To change the mode, select the tasks and click Task › Auto Schedule or Task › Manually Schedule. The mode for new tasks shows on the status bar.
Task information
Double-click a task, or push Shift+F2, to open the Task Information dialog. The dialog has these tabs: General, Predecessors, Resources, Advanced, Notes and Custom Fields.
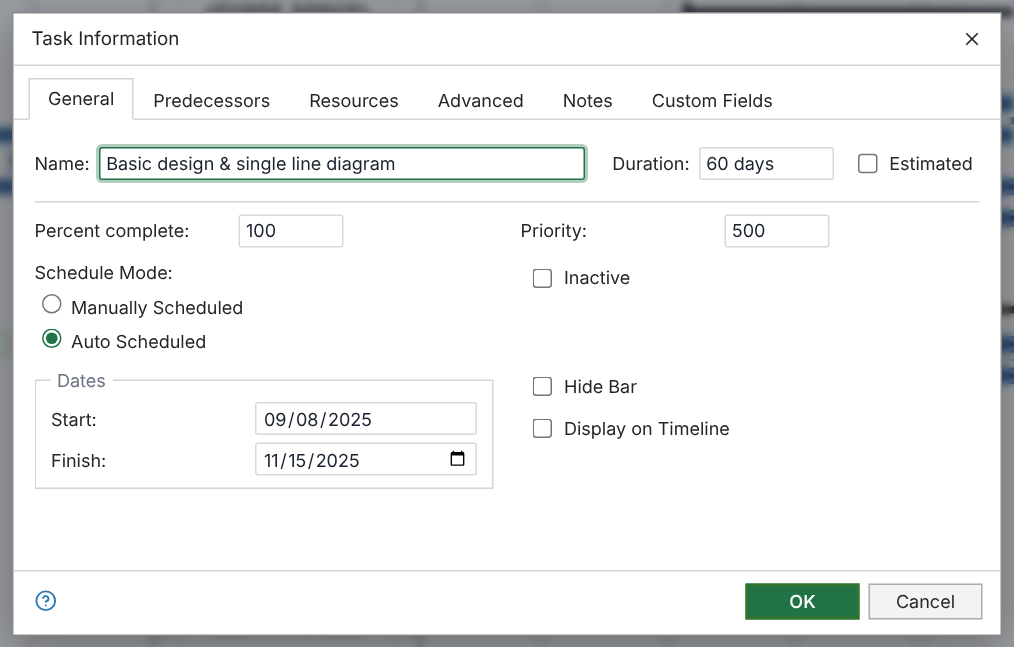
On the Advanced tab, you set the Deadline, the Constraint type, the Task type and Effort driven.
Work, duration and units
When you assign a resource to a task, the Project layout uses this rule: Work = Duration × Units. The task type tells which value stays the same when you change a different value. Figure 6-3 shows the three task types.
To assign a resource
- Select the task.
- Click Resource › Assign Resources.
- Select the resource and type the units, for example
200%for two persons. - Click Assign, then Close.
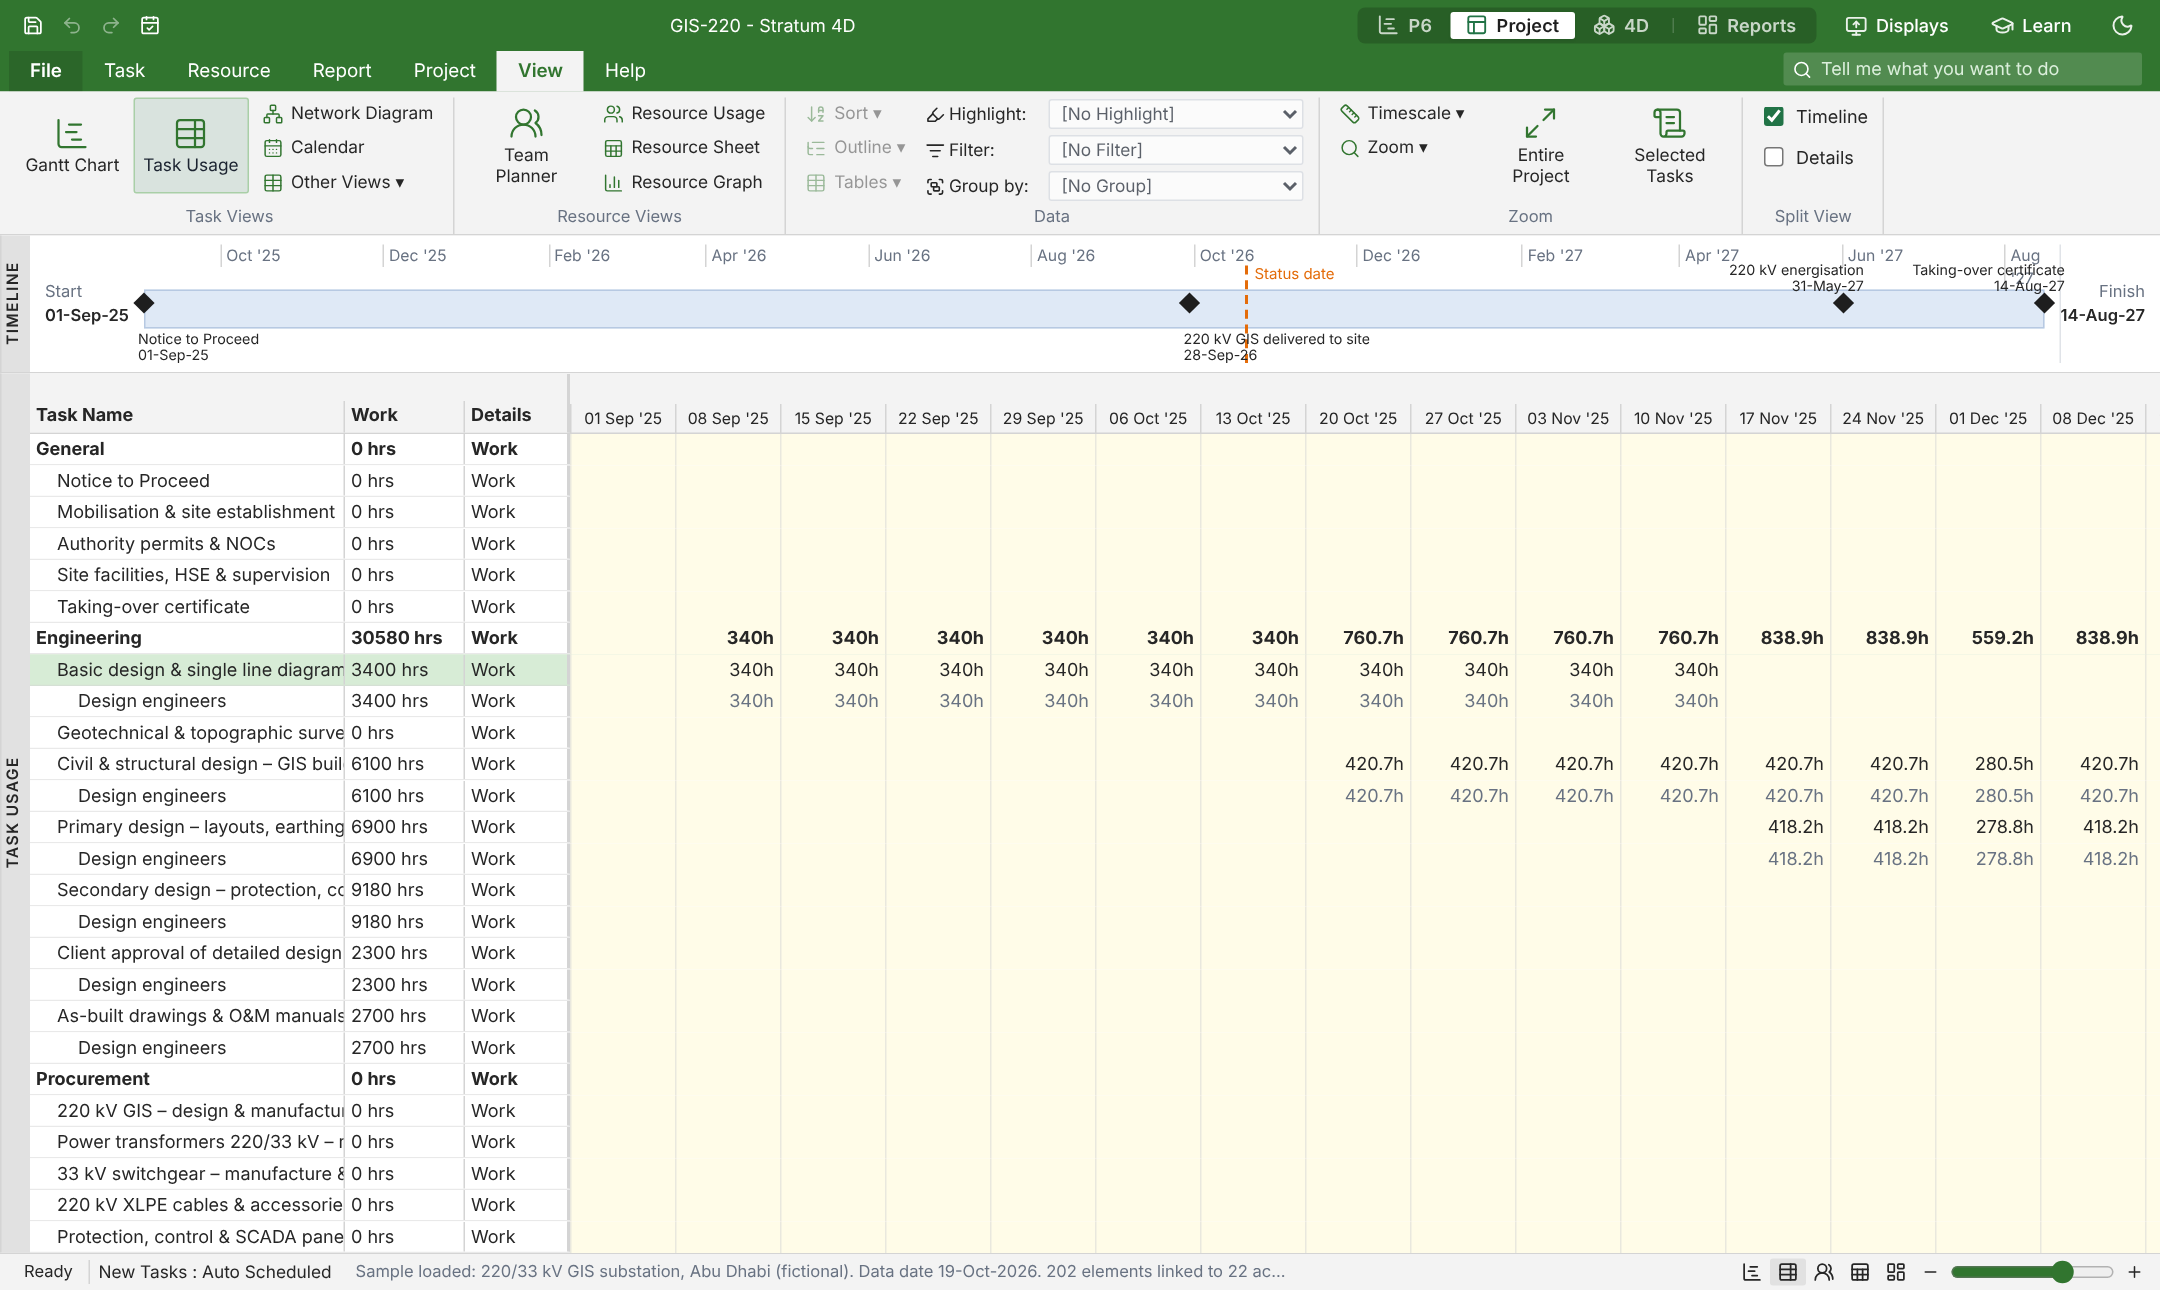
To see the work of each resource for each day, click View › Task Usage or View › Resource Usage. To see the resources as rows with their tasks, click View › Team Planner.
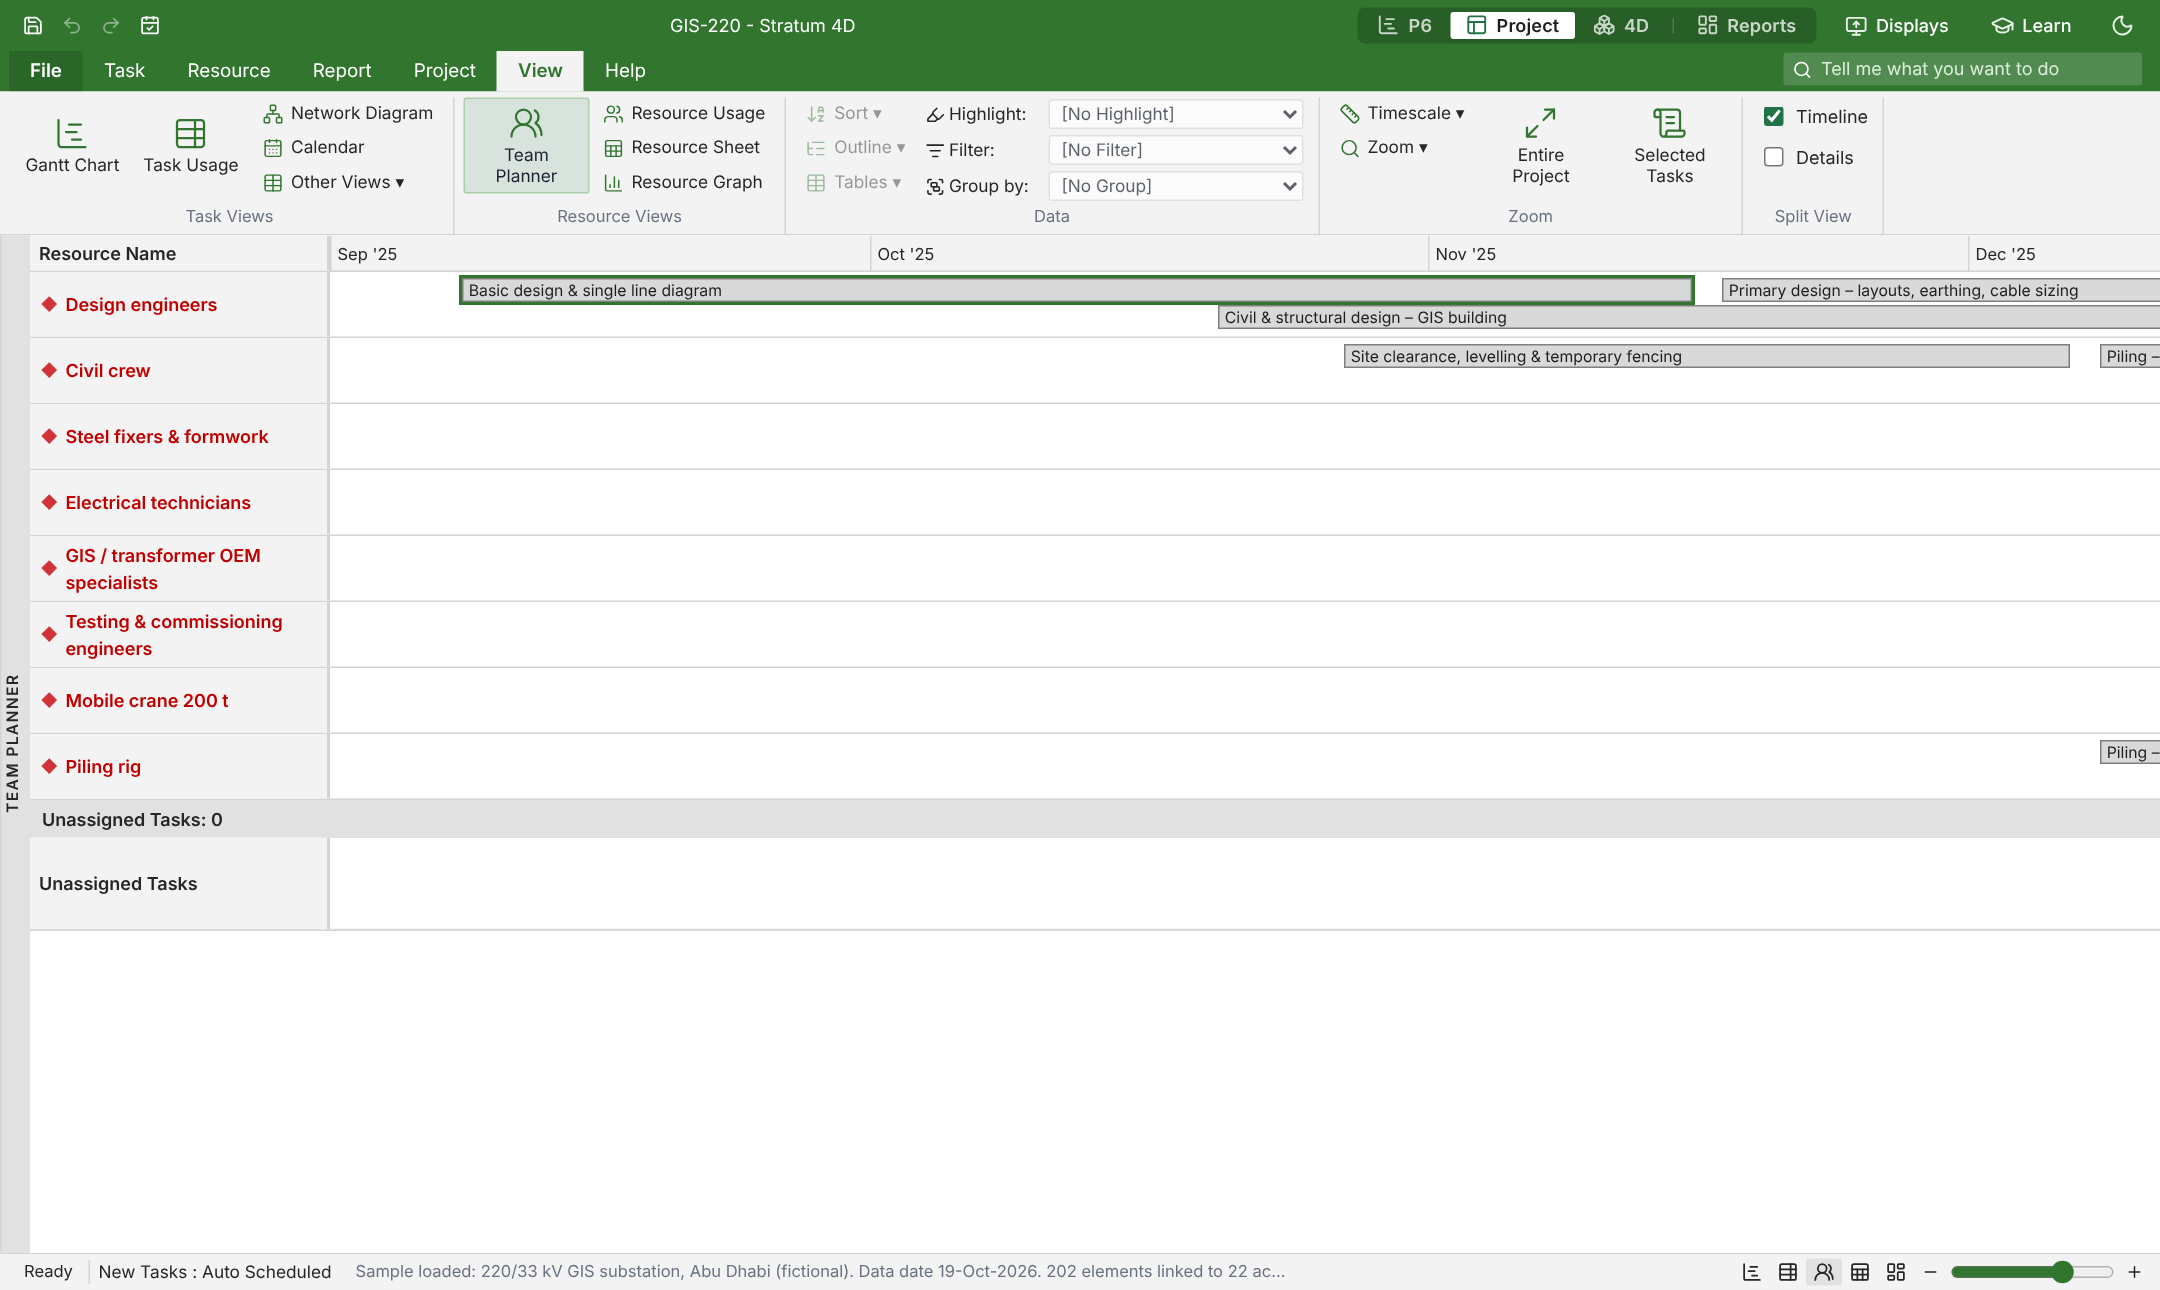
A resource that has too much work shows in red. To find it, click Resource › Next Overallocation. To solve it, click Resource › Level All. To remove the result of the levelling, click Resource › Clear Leveling.
Calendars
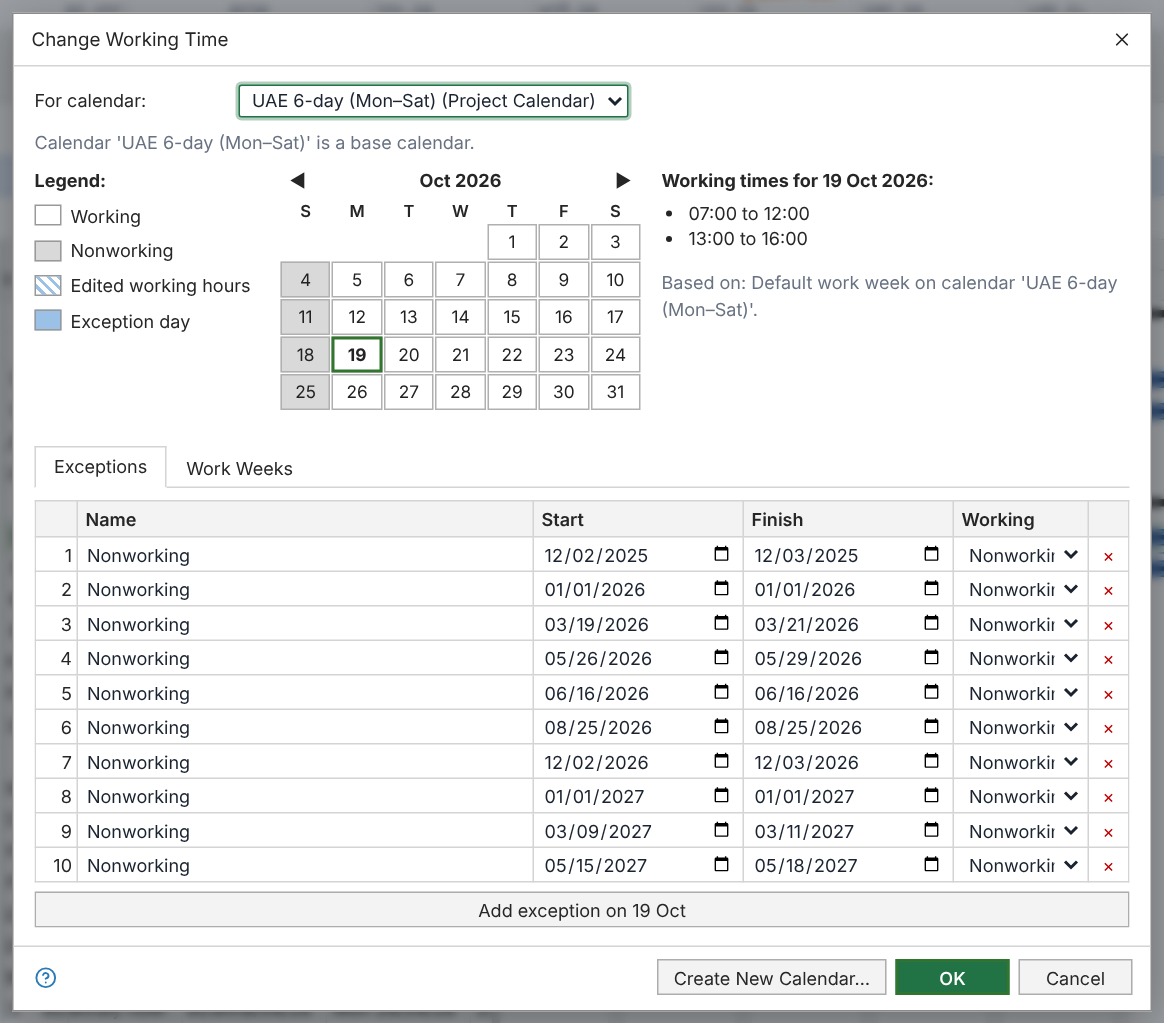
To change the work hours and the holidays
- Click Project › Change Working Time.
- Select the calendar.
- To add a holiday, type a Name, a Start and a Finish on the Exceptions tab.
- To change the work week, use the Work Weeks tab.
- Click OK.
Split tasks and repeated tasks
To stop a task and start it again later, click Task › Split Task. Then click in the bar at the point of the stop. The task gets a gap of one day at that point. Drag the second part of the bar to the new start date.
To add a task that occurs at regular intervals, for example a weekly progress review, click Task › Recurring Task. Type the pattern and the number of occurrences.
Baseline and progress
To set the baseline
- Click Project › Set Baseline.
- Select Entire Project or Selected Tasks.
- Click OK.
To update the project to a status date
- Click Project › Update Project.
- Select Update work as complete through and type the date.
- Click OK.The tasks before the date show as complete. The tasks that cross the date show as in progress.
To record the progress of one task, select the task and click Task › Mark on Track, or type the % Complete in the task sheet.
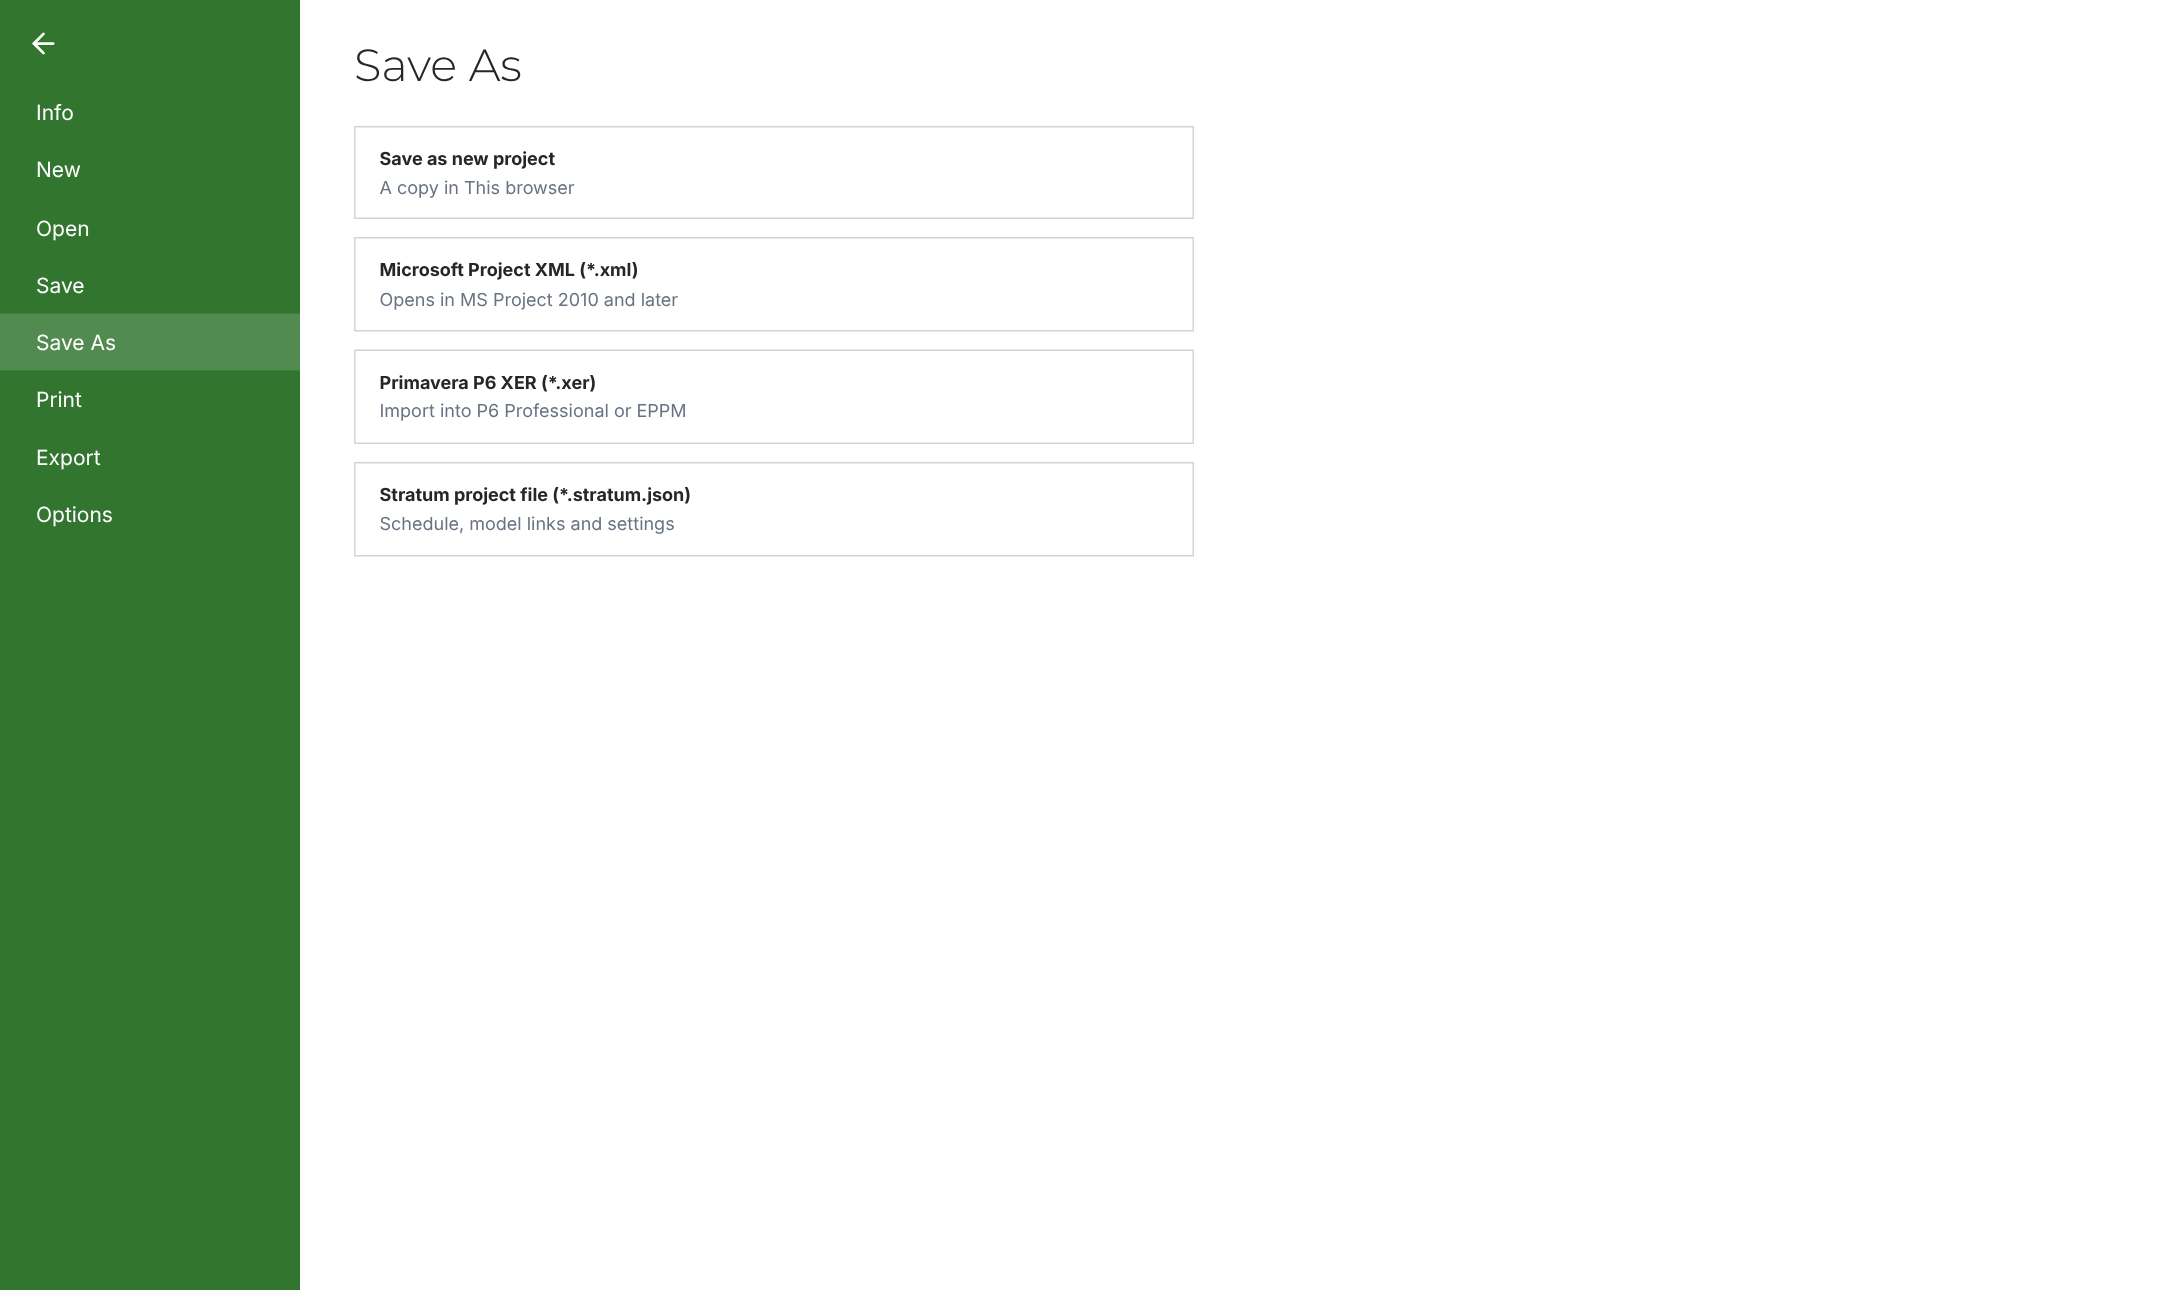
Save for Microsoft Project
To make a file for Microsoft Project, click File › Save As and select Save as MS Project XML. Microsoft Project opens this file directly.