5The P6 layout
This chapter tells you how to use the P6 layout to plan, schedule, update and check a project.
Parts of the P6 layout
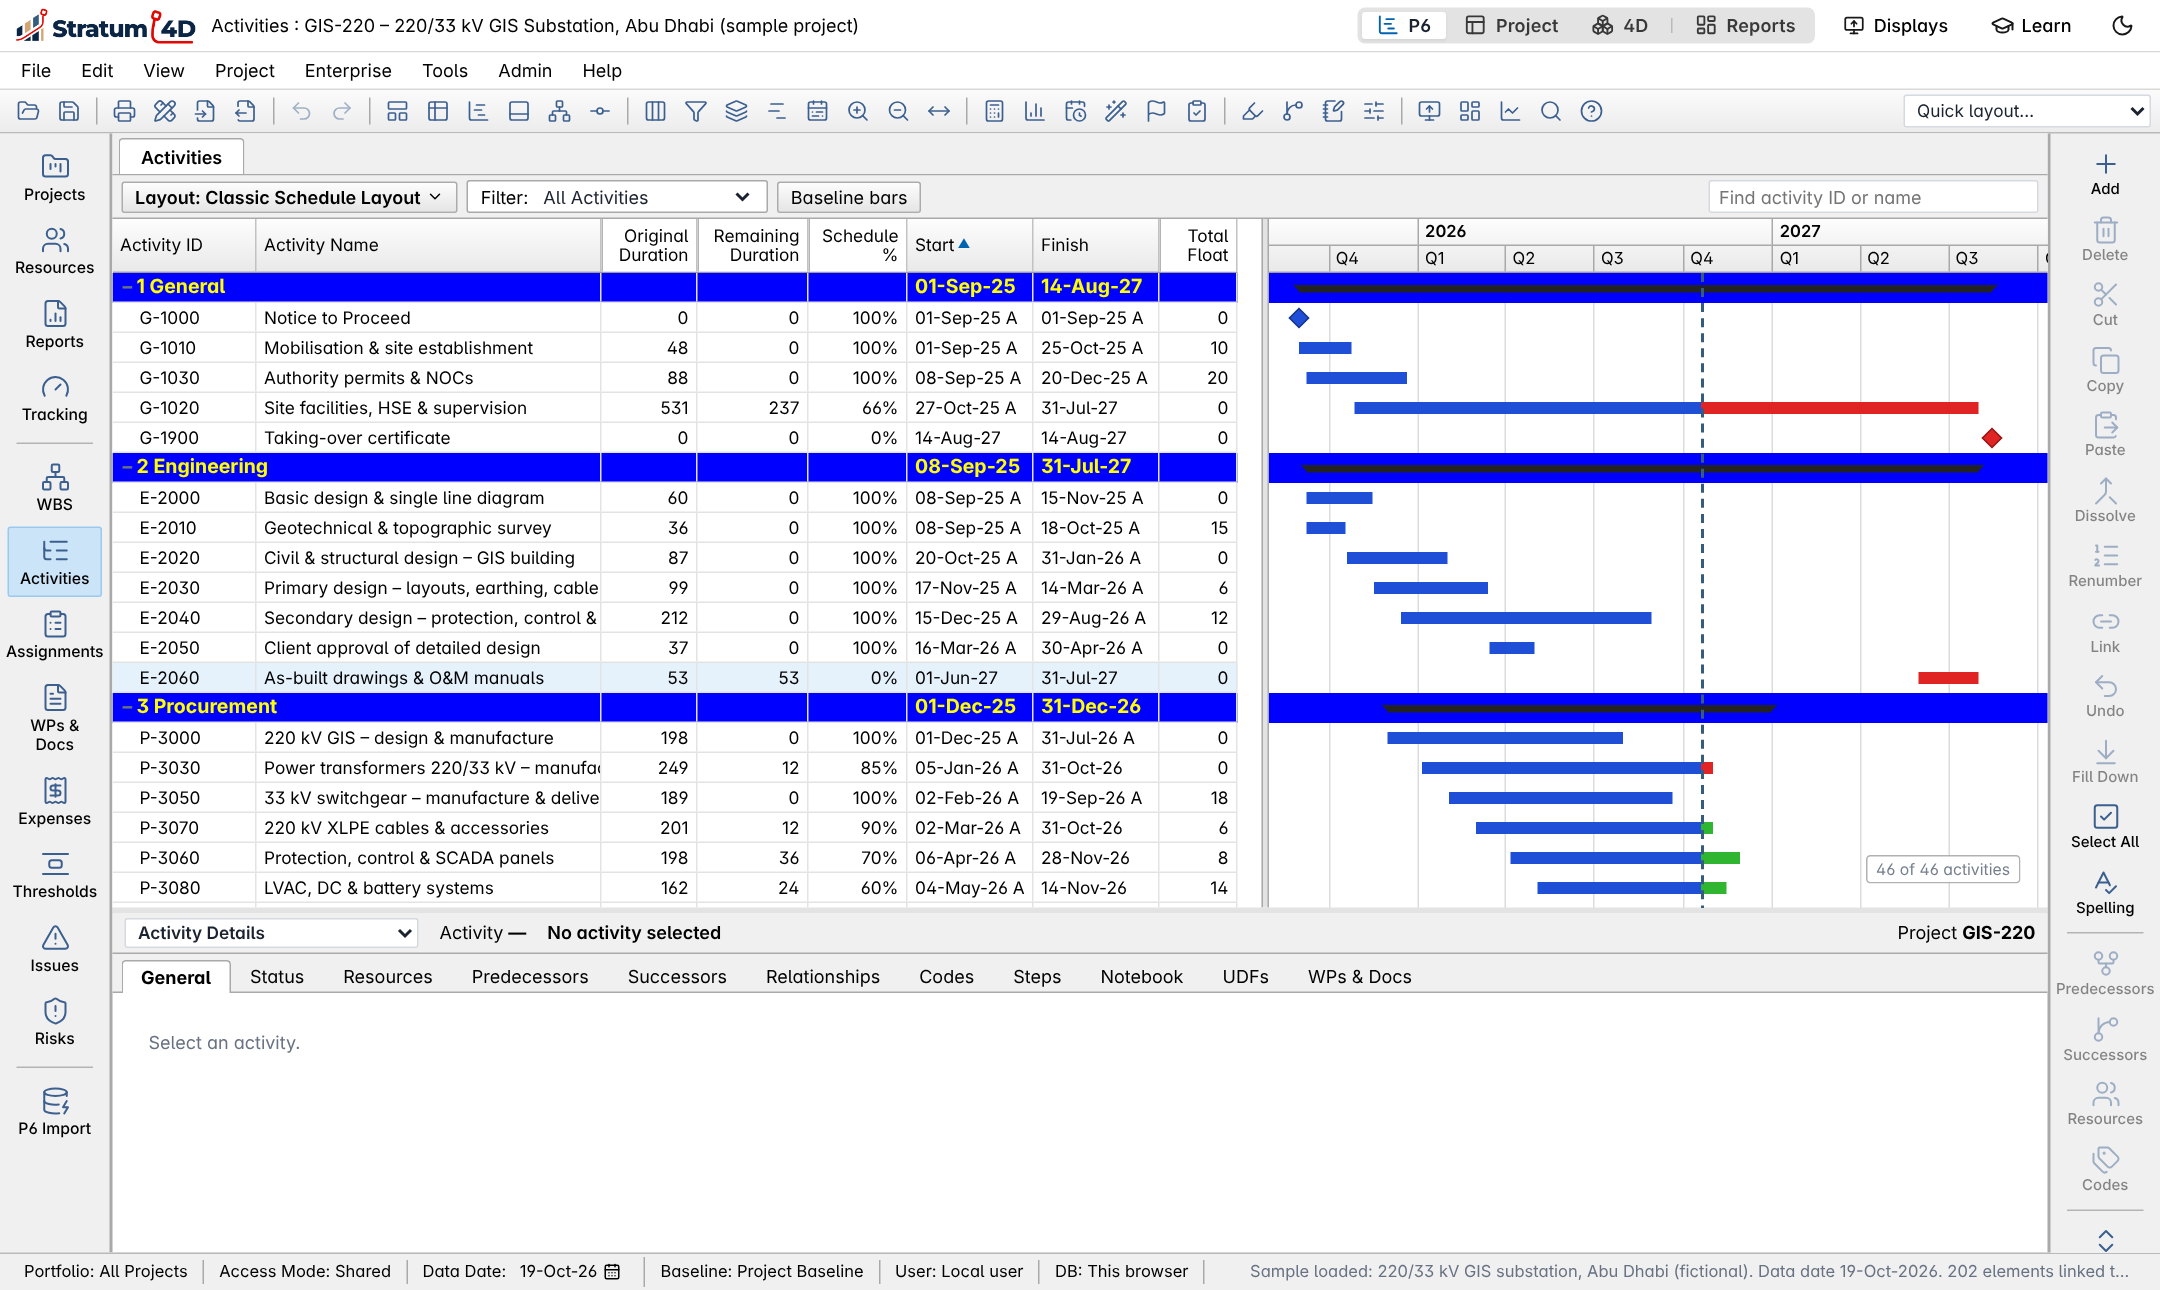
The P6 layout has the same parts as Primavera P6 Professional. If you know P6, you can use this layout immediately.
| Part | Where | Use |
|---|---|---|
| Menu bar | Top | File, Edit, View, Project, Enterprise, Tools and Help menus |
| Window tabs | Below the toolbar | Projects, WBS, Activities, Assignments, Resources, Tracking and more |
| Activity table | Upper left | One row for each activity, with the columns of the layout |
| Gantt chart | Upper right | One bar for each activity, on the timescale |
| Bottom pane | Lower half | Activity Details tabs: General, Status, Resources, Predecessors, Successors, Codes, Steps, Notebook, UDFs |
Make the activities
To add an activity
- In the activity table, select a row in the applicable WBS.
- Push Ins, or click Edit › Add.A new activity row shows below the selected row.
- Type the Activity Name.
- Type the Original Duration in days.
To link activities
- Select the activities in the sequence of the work. Hold Ctrl to select more than one.
- Push Ctrl+L, or click Edit › Link Activities.Each activity becomes the predecessor of the next activity, with a Finish to Start relationship.
To set a different relationship type (FS, SS, FF or SF) or a lag, open the Predecessors tab in the bottom pane. Then change the type or the lag of the relationship.
To assign resources
- Select the activity.
- Click Edit › Assign Resources….
- In the row of the resource, click Assign.The resource is assigned to all the selected activities.
- Click Close.
- In the Resources tab, type the Budgeted Units for each resource.
Schedule the project
The scheduler calculates the early and late dates and the total float of each activity. It uses the logic, the durations, the calendars and the constraints. It starts at the data date.
To schedule the project
- Push F9, or click Project › Schedule….The Schedule dialog opens.
- Make sure that Current Data Date is correct.
- Click Schedule.The dates and the float change. The critical activities show in red.
- To see the result of the calculation, click View Log.
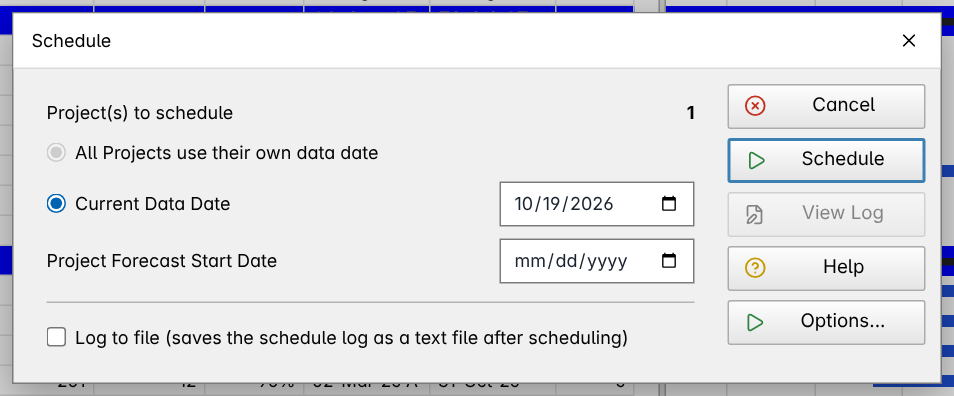
To change the rules of the calculation, click Options… in the Schedule dialog. For example, you can set retained logic or progress override, and the definition of a critical activity.
Set and compare baselines
A baseline is a copy of the project at one time. You compare the current schedule with the baseline to see the slip.
To make a baseline
- Click Project › Maintain Baselines….
- Click Add.A copy of the current project becomes a new baseline.
- Type a name for the baseline.
- To compare the project with this baseline, click Assign as Project Baseline.
- Click Close.
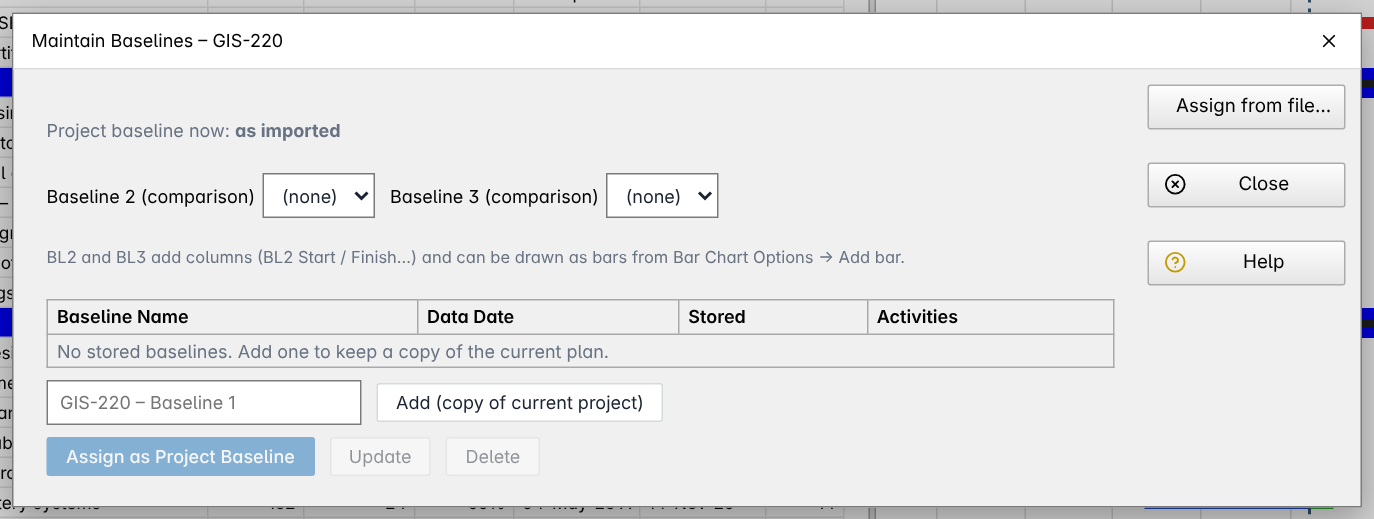
To see the baseline bars on the Gantt chart, click View › Show Baseline Bars. To use a baseline from a different file, click Assign from file… and select the XER or XML file.
Update the progress
Each update period, you record the actual progress. Then you move the data date and schedule again. Figure 5-4 shows the cycle.
To record the progress of an activity
- Select the activity.
- In the bottom pane, click the Status tab.
- Set Status to In progress or Complete.
- Type the Actual start date. For a complete activity, also type the Actual finish date.
- For an activity in progress, type the % complete and the Remaining (days).
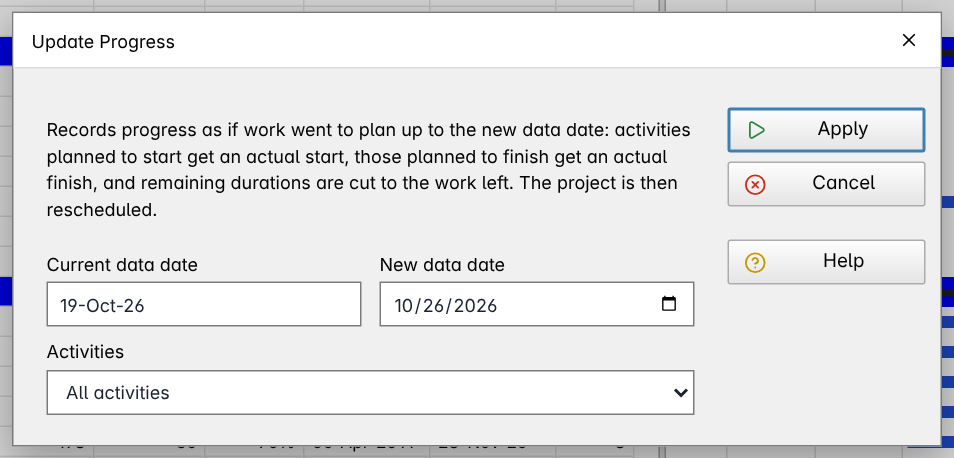
To update all the activities as planned
Use this procedure if the work went as planned. It sets the actual dates and the progress from the planned dates.
- Click Tools › Update Progress….
- Type the New data date.
- Select All activities, or Selected activities only.
- Click Apply.
- Push F9 to schedule the project.
Check the schedule
To do a quality check
- Click Project › Check Schedule….The dialog shows each check with the number of activities that do not pass.
- Click a check to see its activities.
- Correct the activities. Then do the check again.
The checks include missing predecessors and successors, hard constraints, negative float, high float, long durations, leads and lags.
To compare two schedules
- Click Tools › Claim Digger (compare schedules)….
- Open the project of this update. Stratum 4D uses it as the Current schedule.
- For the Base schedule, select a stored baseline. Or click Choose… and select the file of the last update.The report lists the changed, added and deleted activities, and the changed relationships.
- To keep the report, click the download button.
Change the view
| To change | Click |
|---|---|
| The columns | View › Columns… |
| The visible activities | View › Filters… |
| The bands and the order | View › Group and Sort… |
| The bars | View › Bar Chart Options… |
| The timescale | View › Timescale… |
| All of the above, as a set | View › Layout › Save As… and Open… |
To change many activities at the same time, use Tools › Global Change…. Make a filter first, so that the change applies only to the correct activities.
Send the result
To send the schedule back to P6, click File › Export… (XER). To send it to Microsoft Project, click File › Export… (Microsoft Project XML). To print, push Ctrl+P. Chapter 4 gives the procedures.